Configuration / Admin Panel
Automated Translation
This documentation has been automatically translated from Polish. While we strive for accuracy, some nuances may be lost in translation. If you notice any errors or unclear passages, please refer to the Polish version or contact the author.
Note: This manual uses Polish screenshots, but the Firmware itself (Admin panel), on-screen messages shown on the LED display, and the Firmware uploader website are all available and translated to English. The firmware will display English messages and have an English GUI.
To configure the panel, you need to:
- Connect to the controller's Admin Panel from your mobile phone
- Pair the controller with the LED panel
- Connect the controller to WiFi
- Configure your Nightscout address and token
In the controller's admin panel, you can also:
1. Connecting to the Panel from Your Mobile Phone
If your LED panel is powered on when the controller starts, and it's the only such panel nearby – the controller will try to pair with it automatically via Bluetooth and show instructions on how to connect to the controller.
To connect to the controller's admin panel:
-
On your mobile phone, go to WiFi settings, find and connect to the network
akszon-led-skaut-XXXX– the exact name (last characters) depends on the controller's serial number.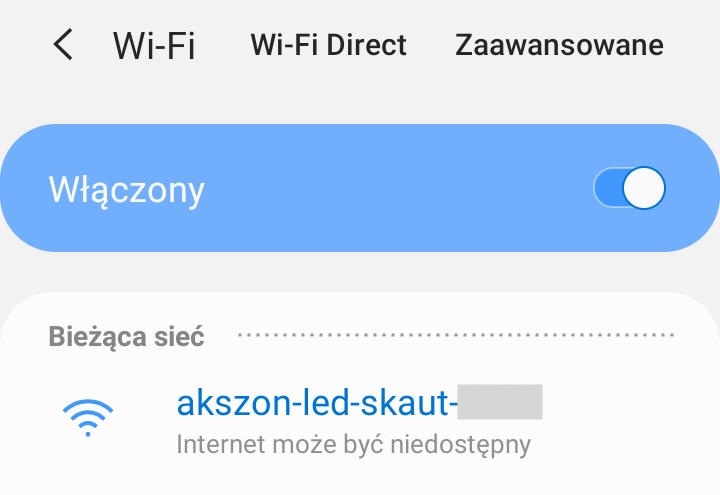
Android will protest that this network has no internet – but that's OK, you're connecting via WiFi to the controller's network
-
On your phone, open Chrome browser and go to address
http://192.168.4.1 - The page will ask for login and password:
- login:
admin - password:
skaut– if you later change the panel password, use your own password
- login:
2. Pairing the LED Panel with the Controller
Important!
![]()
![]()
![]()
If you played with the panel earlier using the original app – first: 1. open it, 2. connect to the panel 
 and 3. delete/clear all uploaded programs

 (menu:
 Program List → trash icon) and unpair/disconnect the panel from the device ( in the right menu with the big +)
After connecting to the controller, don't use the app
If your LED panel is powered on when the controller starts, it's the only such panel nearby, and the controller wasn't paired with a panel – the controller will try to connect automatically. If that didn't happen, connect it manually:
- Power on the LED panel
-
In the Admin Panel on your phone, go to the
LEDtab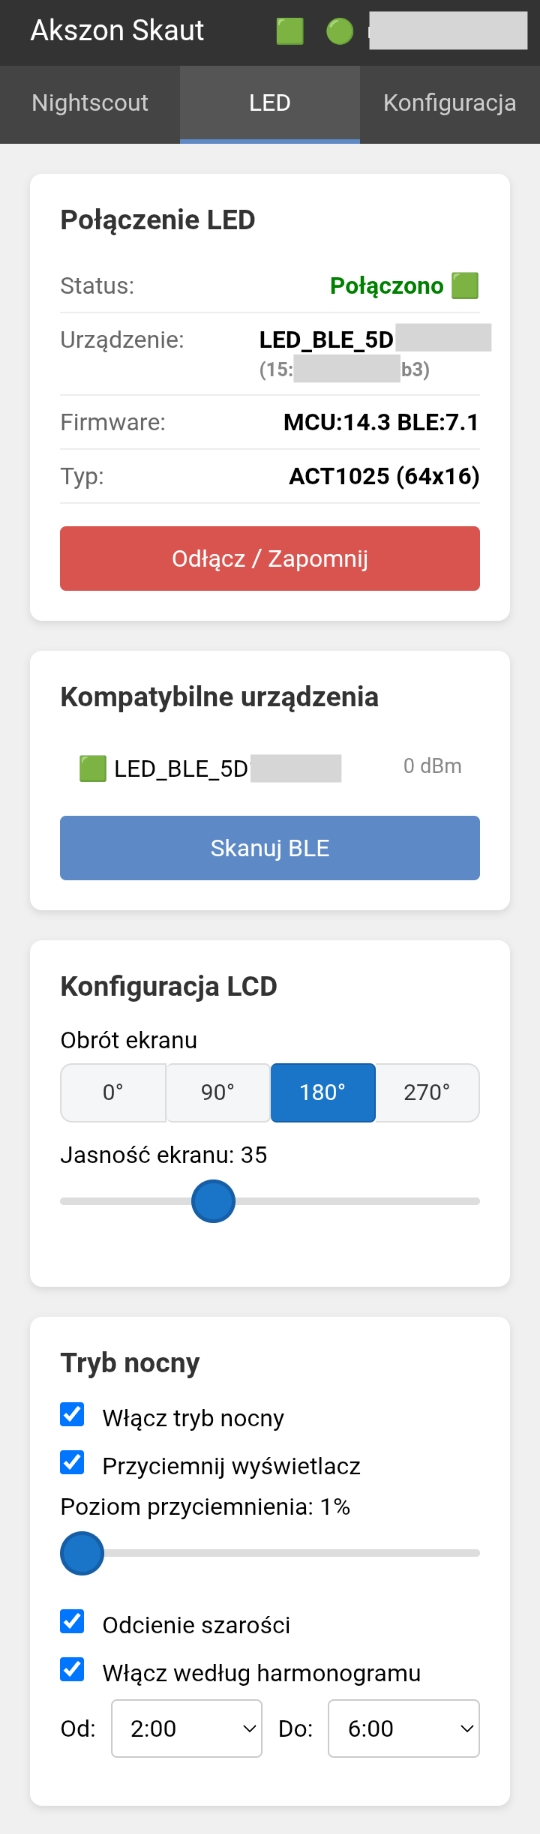
-
In the
Compatible devicessection, click on the detected device in the list - If there's no device in the list – make sure the panel is in range, not connected to the app, and click "Scan BLE" to find panels nearby.
3. WiFi Configuration
Not every WiFi will work!
Due to ESP32 chip limitations, only "typical" WiFi network configurations will work:
- 2.4GHz
- WPA/WPA2-Personal encryption
Fortunately, this is the most popular type, and most routers allow adding such configuration. Phone HotSpot usually works, as long as you set it to 2.4GHz WPA/WPA2-Personal mode and "legacy / compatibility mode".
Won't work:
- 5GHz and 6GHz networks
- WPA3 or Enterprise encryption
- Open "free" WiFi networks with Captive Portal - when logging into the network requires filling out a form on a webpage, providing email, accepting terms of service, etc.
-
In the Admin Panel, go to the
Configurationtab, then theWiFisub-tab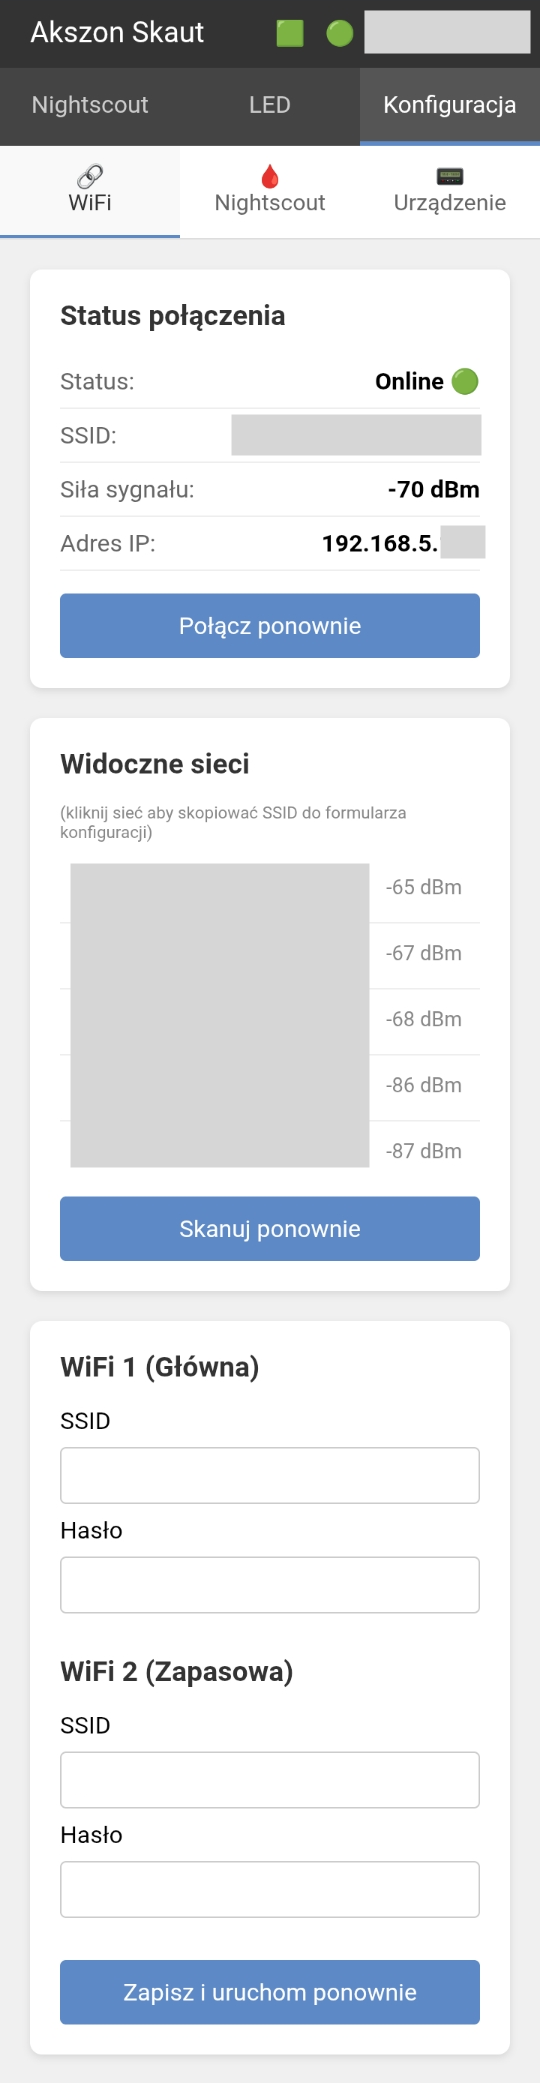
-
In the
Visible networkssection, clickScan againto search for available WiFi networks - By clicking on names, you can auto-fill the SSID fields in the form below
- Select at least one, but preferably two strongest networks (that you have access to, your own!) and enter their passwords
-
Click
Save and restart. Wait for the device to reboot.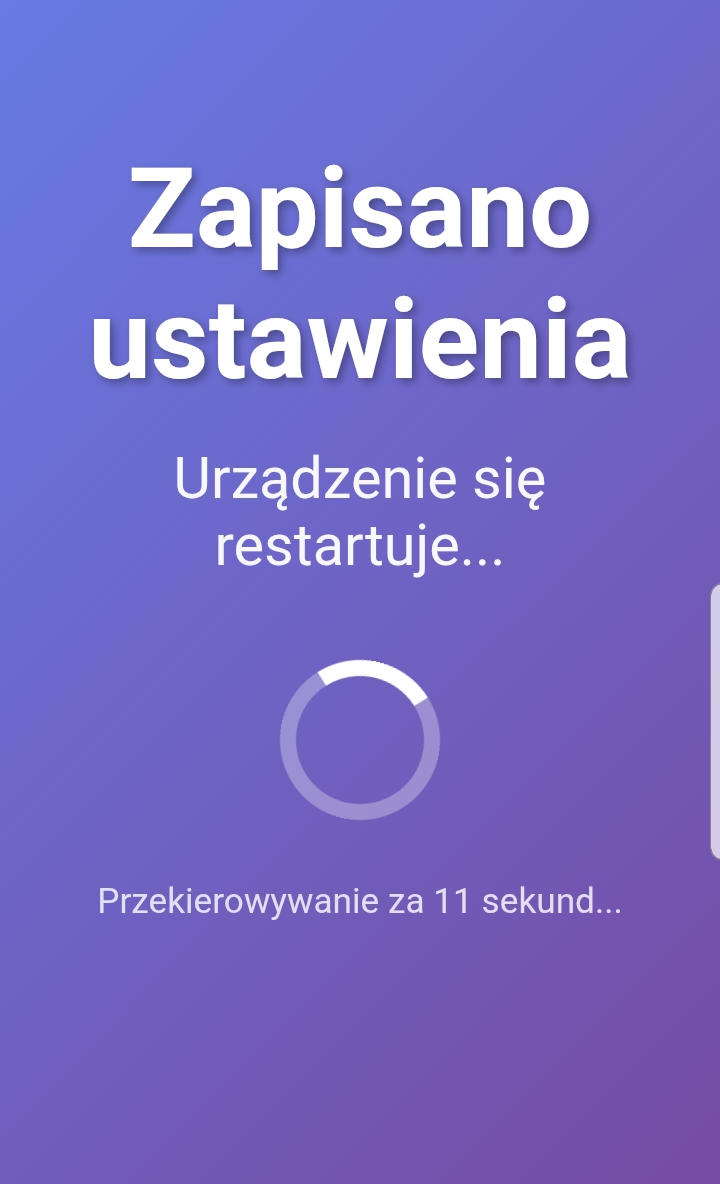
After reboot, the controller will try to connect to WiFi on the panel:
After connecting to WiFi, the panel displays its IP address on the local network. You can use it while on your home WiFi to configure the controller (address 192.168.4.1 won't work; example below – your address depends on your WiFi router configuration)

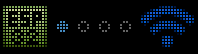
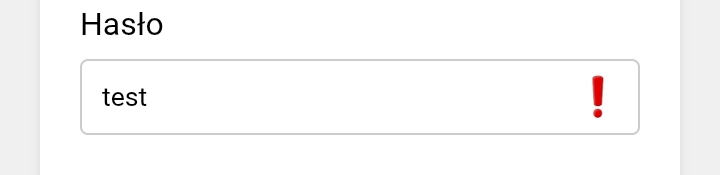
Then further instructions will appear – or an error message: - If the password is incorrect, the controller will try to use the backup network; with a wrong password, an exclamation mark will appear in the Panel:
-
Sometimes connection takes a bit longer. If you see a "WiFi Error" message or the WiFi connection animation – wait a few minutes. WiFi error or a several-minute-long NS connection message may indicate problems with your network or WiFi router, e.g., no internet access (WiFi network works, but there's an outage or failure at the internet provider)

4. Nightscout Configuration
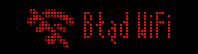
Missing required configuration is signaled on the LED panel with a message about missing Nightscout URL:
-
In the Admin Panel, go to the
Configurationtab, then theNightscoutsub-tab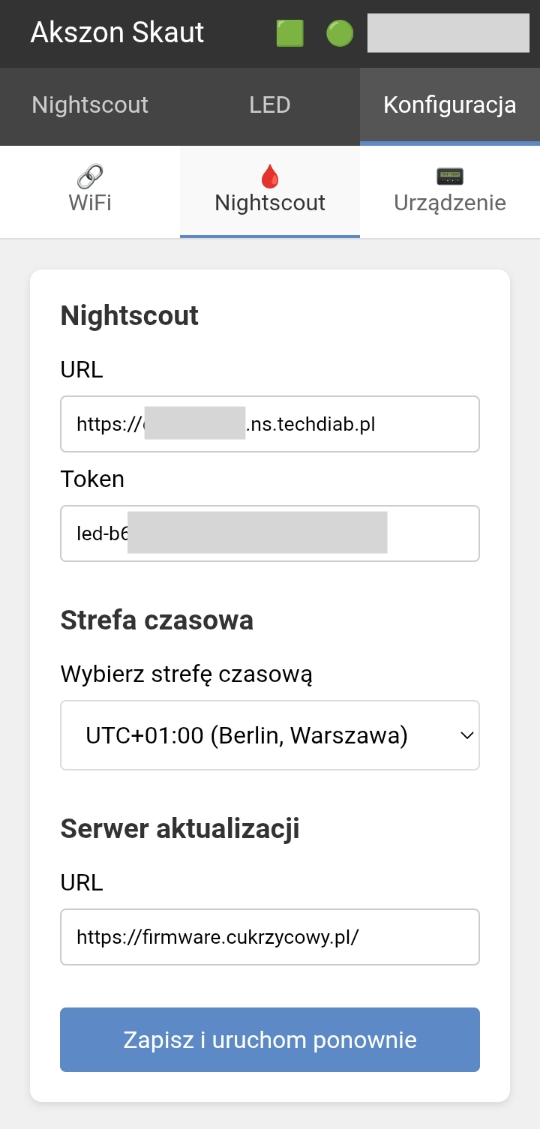
-
Enter the URL of your Nightscout page, with
https://at the beginning, but only the server address, e.g.,https://myaddress.ns.techdiab.pl -
Provide the Nightscout access token, e.g.,
led-XXXXXXXXXXXX.You'll generate it on your Nightscout page:
Hamburger menu → Admin Tools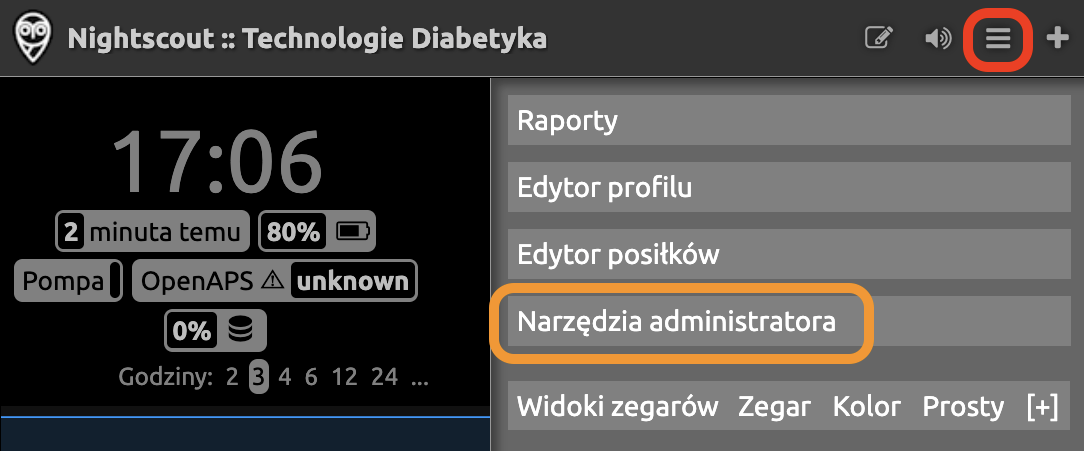
Add subject→ Name: led, Role:readable→ Save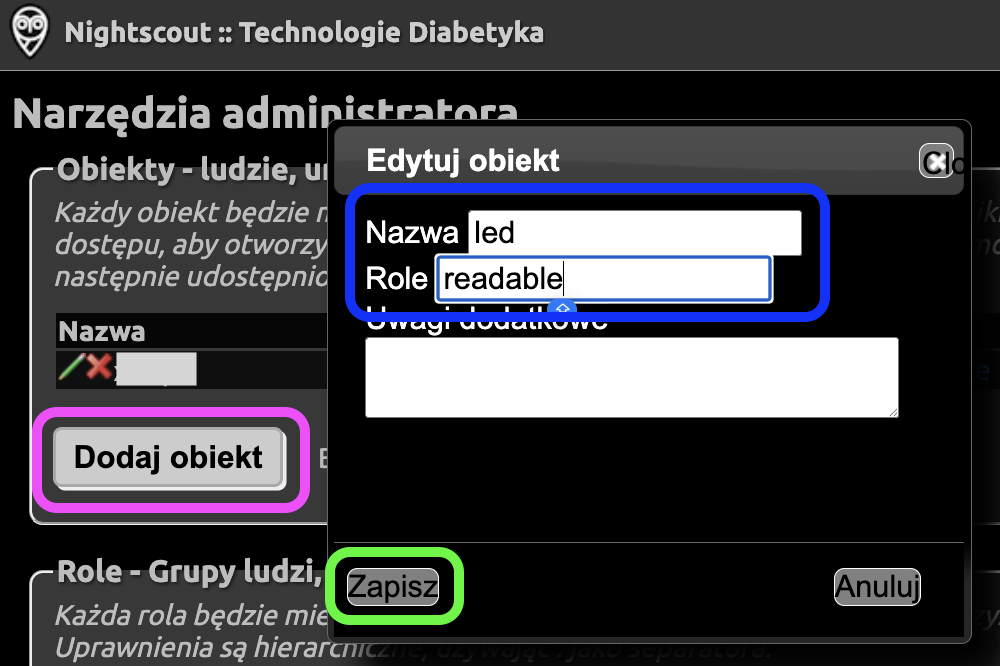
The token to copy will appear in the

Access Tokencolumn
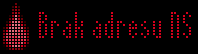
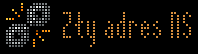
If the provided URL exists but it's not a Nightscout server, or there's an error in the address (typo, missing https:// at the beginning, unnecessary extra parameters at the end), a message about an invalid Nightscout address will be displayed:
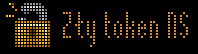
If no Nightscout token is provided, or the token is invalid, a message about a bad token will be displayed:
Night Mode
The panel is made with LED technology – these are RGB LEDs that shine quite brightly (unlike classic non-OLED LCD panels, where a bright white backlight shines and a polarizer "blocks" it) and are clearly visible during the day. The panel comes with factory brightness configuration, which we set in the LED → Screen brightness menu. However, this setting has limited range, and at the lowest settings (brightness = 0), the panel still mercilessly blinds you at night, like a large-format billboard 
Night mode allows you to additionally dim the screen. We'll find the night mode section in the LED tab:
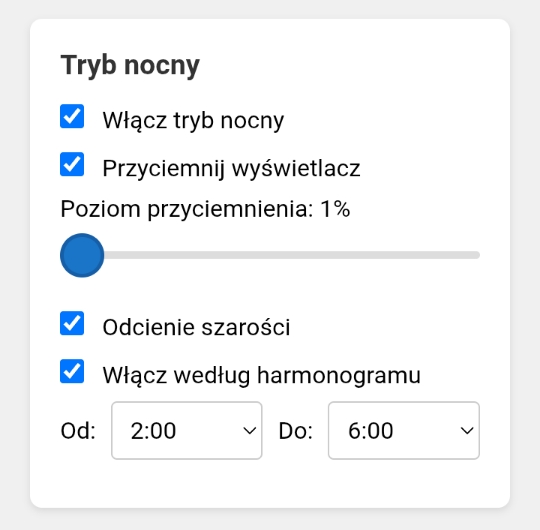
Here you can decide whether:
- You want to enable night mode
-
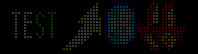
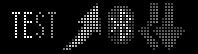
You want to dim the display e.g., 75% brightness:
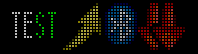
or to 1% (maximum dimming):
-
You want to use grayscale (independent of dimming, you can combine these two modifiers)
-
You want night mode to be active all the time, or only during specified hours
In night mode, besides dimming/grayscale, animations are also limited – so the panel doesn't "blink" as much.
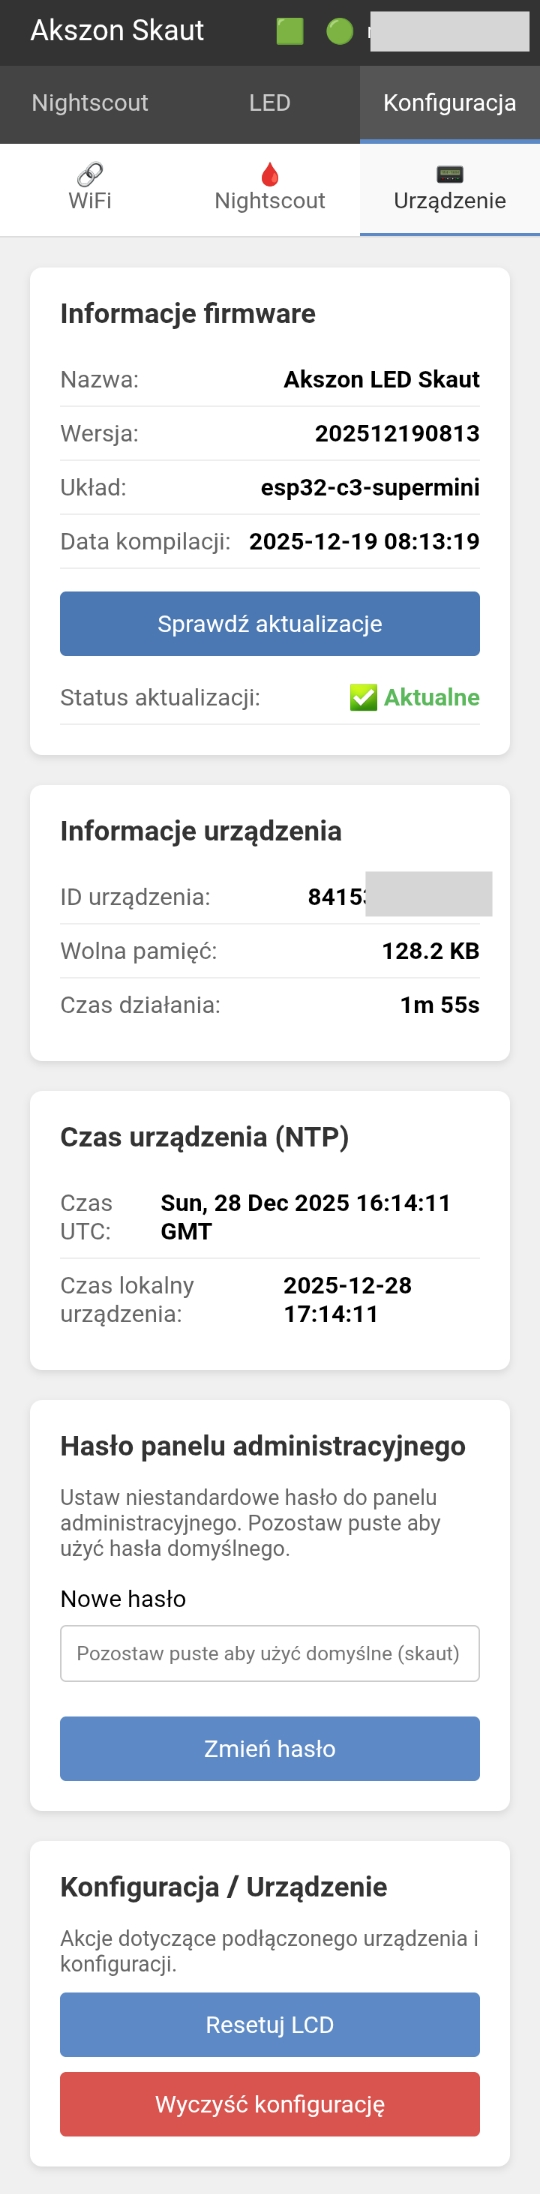
Other Settings
In the panel, you can also:
-
View data received from Nightscout,
Nightscouttab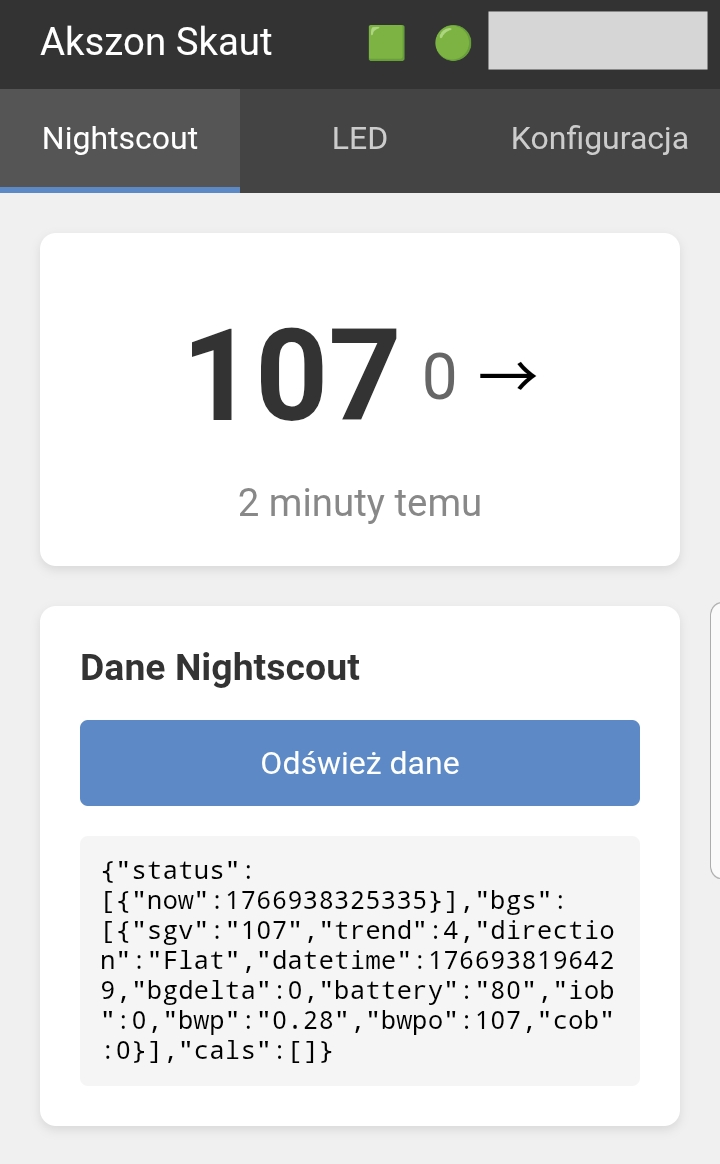
-
Change timezone (default: Poland/Warsaw),
Configuration→Nightscout→Timezone - Change LED panel brightness,
LED→LED Configuration - Rotate the LED panel by 180° – if you want to mount it with the USB port facing a different direction,
LED→LED Configuration - Enable night mode – so it doesn't blind and flash at night,
LED→Night mode -
Change the default admin panel password,
Configuration→Device→Admin panel password